Monday, February 21, 2011

Calzones

Remember last week when I made pizza? Well... the dough I used actually makes enough for two pizzas & P-Dub suggests letting the dough refrigerate for 3-4 days. About Wednesday of last week, it was time to use the dough. I also had some leftover pepperoni, so I'd use that up, I figured. 

But, we just ate pizza a few days ago... What else could I make with it?

Calzones!

Now, I'm really proud of myself for these. Why, you ask? Because I didn't follow a recipe exactly, word-for-word, which is an accomplishment for me. I really struggle with improvising while cooking, but I did it for these - & they were delicious!

So, I grabbed the dough from the refrigerator and punched it down.
Then, I shredded some cheddar cheese and got out some mozzarella. 
This was based on the calzone recipe from my Baker's Illustrated book - I smoothed the dough out into about 8-inch circles. 
Then, I spread the cheese and pepperoni (should have used two more pepperoni pieces) onto one half of the circle. [The pepperoni is shaped funny because it's the outside of the hearts I cut out ripped into pieces.]
Next, I folded the circle in half and sealed the edges together. 
Based on the Baker's Illustrated cookbook, I slit wholes into the top of my calzone. 
Then I cooked them for 10 minutes at 500 degrees. 
[Jeremy made the marinara sauce.]
They were super tasty - I will definitely be making these some more! They also made for great lunches leftover!

Also, I'd like to wish Leslie a VERY happy 25th birthday! Love ya, girl! Have a great one!

Sunday, February 20, 2011

Weekend Fun

Yesterday, Jacob and I spent a good majority of the day enjoying some bonding time.

What should we do, I wondered yesterday morning. I have extra tickets to Fossil Rim Wildlife Center, but I knew Jeremy would want to join us there, so we're doing that today.

Friday night, the Horned Frog baseball team [ranked number one] beat Kansas 8-2, and they were playing again Satuday at 2:00, so I decided we'd head out there. After we got Jacob a TCU baseball shirt and baseball cap, of course.

So I made a little lunch (macaroni & cheese to be blogged about this week) and we headed to campus. I found him this shirt and cap. The shirt's a little big, but it's the smallest they had. It'll shrink and he'll grow, I figure.

He looked pretty handsome, didn't he?
While walking across campus, Jacob found a dandelion seed and ran over to it. He was about to blow it out when I told him, "You have to make a wish!"
"I wish..." he said.
"No! You can't tell me your wish! It won't come true," I told him.
"I was telling myself," he told me.
"Oh, okay."
His wish - "I wish I could marry Vicky."

Isn't he sweet?
We had a great time and will definitely be enjoying more TCU baseball games this spring... maybe daddy can join us, too! 

Then, we met up with Jeremy and had hamburgers for dinner and watched a movie together. I even baked them their favorite, s'more cookies!

Today, we're headed out to Fossil Rim. I'll try to get some photos for blog's sake!

Friday, February 18, 2011

Cheesecake

When I made all of that deliciousness on the snow day last week (hard to believe we had a snow day last week considering I just walked to the courthouse and it's 75 degrees outside right now), I had to make dessert, right?

The boy has been asking for my S'more Cookies for a while, but I didn't want to make it that quickly back-to-back. Also, I was out of flour (tragedy!) and the roads were covered in ice. What could I make with next-to-no flour?

Cheesecake! The boy has been asking me to make it for probably a year. I got to looking up recipes and called Terry, who sent me a few. The problem: each one of them had SOMETHING that I didn't have. Eventually, I looked in my Better Homes & Gardens cookbook and found this one, which I was only missing the walnuts (I substituted pecans) and lemon peel, which is optional.
I mixed the crust combination together.
And enlisted the boy's help spreading it into the spring-form (which Jeremy's mom generously gave me a while back and I had yet to use).
Then, the filling...
Yummmm.
Isn't that beautiful?
And cooked it.
It was mighty tasty.
Can't you tell?
Make one soon. You'll thank me.

Thursday, February 17, 2011

Oven-Roasted Potato Wedges

Last week, I made a trip to Half Price Books in search of some cookbooks. One of the books I bought was The Easy-to-Use Beginner's First Cook Book by Bridget Jones. I brought both books home, flipped through them and flagged the recipes in each I'd like to try pretty soon. In the books by Jones, I flagged the oven-roasted potato wedges because they looked delicious.

I've never been a big potato wedges fan. I love mashed potatoes, baked potatoes and french fries (you know, the healthy potatoes), but I've never really liked boiled potato chunks, any kind of potato chunks or potato wedges. They just have a certain potato taste I don't really like.

But, the picture in this book made them look too good. I had to try them out and decided to have them with my brisket last Wednesday.

Here's the recipe:

Olive oil
4 medium to large potatoes
1 tsp mixed dried herbs
sea salt flakes

Preheat your oven to 475 degrees. Coat your pan (a shallow roasting pan) with olive oil and stick in the oven to get really hot. 

They wind up looking like this, and my best description was a potato chip taste on the outside with a baked potato taste on the inside: perfect, am I right?
Cut your potatoes into long, thin wedges and rinse off. Dry with a dish towel.
Once your pan has had enough time to get really hot, put the potatoes into the pan.
[Explanations for why I used two pans at the bottom of this post]
Sprinkle the herbs over it (I used a good amount of basil, salt and pepper)
Cook for 20 minutes. They'll look like this.
The recipe suggests serving with mayonnaise. I don't like mayonnaise, but the boy really liked them in mayo and barbeque sauce.

Lesson of the day: When you spill stuff in your oven, make sure to clean your oven really well afterward. Remember when I made Beer Bread and used way too much sugar and it spilled everywhere? Well, the boy did clean up a little for me, but I don't think either of us realized I would later be heating my oven up to 475 degrees. So I put my first pan in the oven to warm up per the above recipe, and after a few minutes, Jeremy asks me why the apartment is so smokey.

Maybe because my oven is on fire?

Wednesday, February 16, 2011

Brisket

One week ago today, I was out of school because of snow and it was fabulous I decided to try my hand at cooking a brisket.

I used the recipe from Better Homes and Gardens cookbook for Beef Brisket with Barbecue Sauce. Let me tell you, the barbecue sauce this thing makes is AMAZING

Anyway, I cooked it in the crockpot.
I poured the seasonings and whatnot over it.
Once the brisket was almost done, I used the reserve sauce and made fantastic barbecue sauce.
It was FABULOUS!
Lesson of the day: When the cookbook says "10-12 hours on low or 5-6 hours on high," that does not mean set your crock pot to "warm" for 6 hours.

Somehow, I accidentally set my crock pot to warm, so it was clearly not done at 6 hours, although it had cooked some. I ended up setting it to high for about 3.5 hours and it was unexpectedly still great! Although, I still don't suggest cooking it that way.

Tuesday, February 15, 2011

Beer Bread

Last week my step-grandma, Terry, called me with a few recipes. One of them was for beer bread. Fortunately, I had two (read why that's important later) beers in my fridge (I don't normally keep beer since I don't drink it). It was a snow day and I was already in the kitchen cooking up some other things (to be blogged about throughout the week), so I got started on the beer bread.

It was super easy, she told me, you basically just throw the ingredients in a bowl, mix it up and cook it. Sounds easy enough, right

3 cups flour
4 teaspoons baking powder
1/4 cups sugar
1 ¼ teaspoons kosher salt
12 oz. beer
3 tablespoons melted butter

Preheat oven to 375 degrees. Butter loaf pan and set aside. In a large bowl (of your stand mixer), combine flour, sugar, powder, salt and beer. Mix well until sticky. Pour into loaf pan and bake 45 minutes. After 45 minutes, remove from oven (leave the oven on), brush the top with the melted butter, cook for 5 more minutes.
I started my mixer with the dry ingredients and poured the beer in while it was going.
It'll turn into this big clump.
Then, you work it into a loaf pan, but it's not going to get smooth.
After baking for 45 minutes, pour the melted butter on and spread it around.
Bake for 5 more minutes
It'll come out looking something like this.
Now, a quick lesson.
Always: Listen very carefully when getting recipes on the phone. Confirm ingredient measurements.

You see, when Terry told me 1/4 cup of sugar, I somehow heard 4 cups of sugar. When making the bread (the first time), I thought this was an insane amount, but I went with it. That is, until, Jeremy asked me what the burning smell was and I looked in the oven to find most of my "bread dough" on the bottom of the oven (which did lead to other mishaps you'll read about this week). 

Jeremy helped me clean out the oven. I texted Terry and she said "NO! 1/4 cup!" so I got started again and the next batch was delicious! Good thing I had two beers, huh? It's a great bread for soups, chili, etc.

Monday, February 14, 2011

Valentine's Day: Gifts for my Boys

Well, we exchanged gifts Saturday night. I couldn't wait any longer because I was so excited about the gifts I made for the boys.

The idea had some origination with this blog, or what this blog is about. You see, just about every time I'm in the kitchen making food or goodies, both of the boys tend to waltz in and "test" the food... you know, just to make sure it's safe to eat. Right?

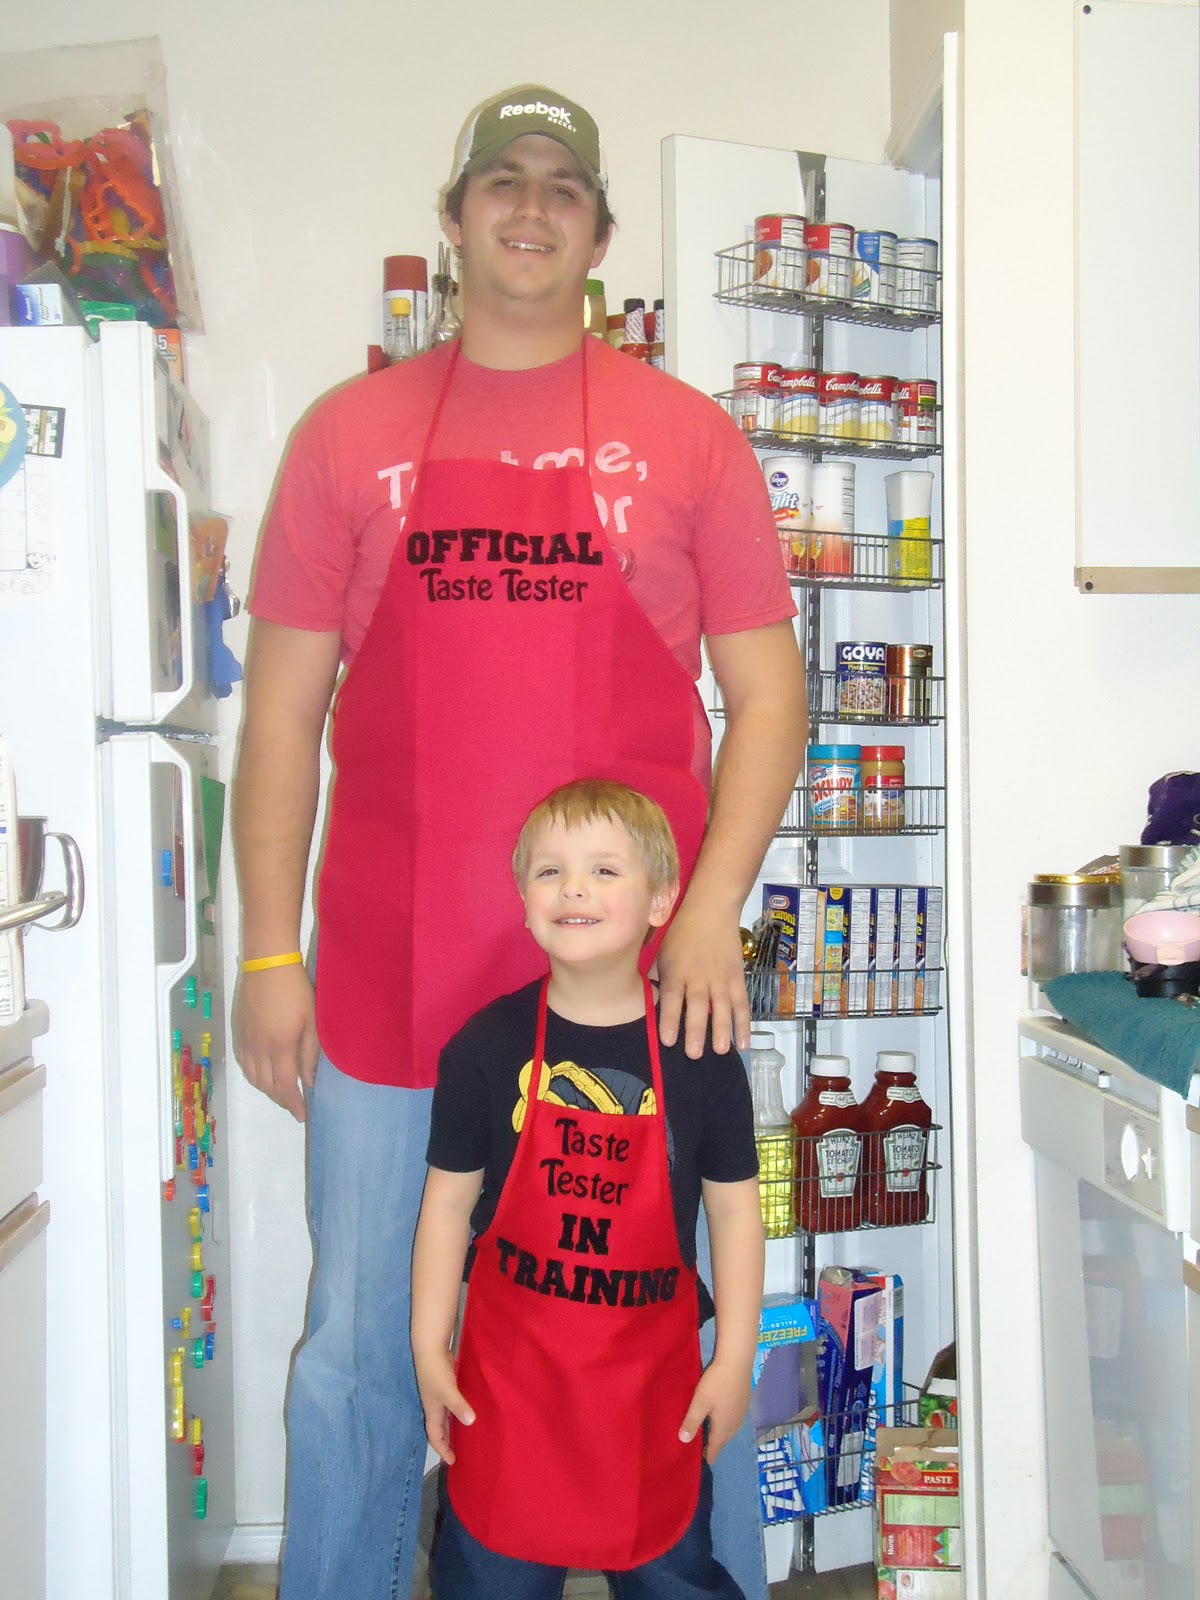
So, I decided to make them these aprons.
I found the aprons at Hobby Lobby (Jacob's) and Michael's (Jeremy's). I grabbed the iron-on letters at Hobby Lobby and got to work.
 Some friends helped me come up with the titles for each.
 I'm not going to lie, I was a little nervous about the size on this one. The adult size was a one-size-fits-all, and if you know Jeremy, you know he's not the typical adult size.
 Here's Jacob's.

And here they are! Jeremy's is a little short, but it's okay! I thought they looked pretty dang cute!
Now, what I'd love to do is create some type of graphic (I'm still wanting the "Miss. Vicky" graphic to 'sign' each of my blogs) that has the "Official Taste Tester" and "Taste Tester in Training" that says "approved" if the boys both approve of my dish.


But... I'm graphically challenged. 
Any help with that is appreciated!