
So, if you'll remember my first post about cookie decorating, and look very closely at them, you'll notice they're not very cute. They're quite juvenile. I wanted mine to be cuter, like the ones the other blogs I've read - or like the ones my aunt, Jill, decorates. You see, my earliest memories of both Jill and decorating sugar cookies go hand-in-hand, as we'd decorate cookies together quite often (at least, that's how I remember it.) So, I decided to teach myself how to decorate cookies a little less juvenile than before.
I changed sugar cookie recipe to one that Terry (step-grandma) gave me. Use your favorite sugar cookie recipe to work with. The ones I made before were good, but these were so easy to work with, which was great for cutting with cookie cutters.
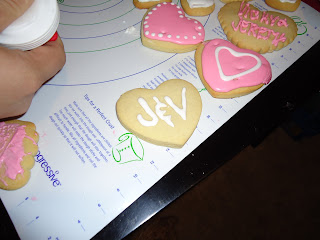
Because Valentine's Day is right around the corner, I chose hearts. I made TONS of small hearts because I knew I'd be experimenting...
P.S. These pictures are from two separate days of decorating, which is why the colors and what not are different.


Once the cookies were baked, I needed to make my icing. I read on Bake at 350 about Royal Icing... but something about it seemed very intimidating to me.
Fortunately for me, Terry also sent me an icing recipe, with permission to share...
3 egg whites (Making this recipe, I finally learned to separate eggs... yes!)
4 cups powdered sugar
1/2 teaspoon cream of tartar
1/2 teaspoon almond extract
1/2 teaspoon clear vanilla
Throw them in your mixer and mix at medium-high for 10 minutes. While working, spoon out what you need at any given point and put a damp towel over the rest so it doesn't dry up.

This was my first attempt... FAIL! (I'm going to use the word "fail" more often in my blogs because that's the only time I got comments.)
See, to fill in the cookies, I learned you need to "flood" the icing. It took me a few tries to get this right and it's going to take lots more practice. But, I used Terry's recipe, Pioneer Woman's blog about getting the flood consistency right & this video from sweetopia to finally figure it out. Teaching yourself at it's finest, folks... thank goodness for the internet!

Now that I finally I had it figured out, I'd outline the cookies with the icing as is (not flooded).


Then, fill them in with the flooded icing... yay! This is what it's supposed to do!

Then, I toyed with the toothpick designs...

And made all of these...
(The boy took the icing from me and made this one. Ain't he sweet?!)
On my second decorating day, I made these pink and purple cookies...
 And these, which are supposed to be like the Valentine's candy hearts.
 But, when the boys are around, never fear they won't want to join me...


And, per usual, get silly...

 So, that's my experience so far. I have lots to learn, but I'm proud of what I've accomplished thus far on my own. One of the main things I have learned is to use the disposable pastry bags. If you'll see from the pink/white batch, I'm using containers... it was just too difficult to guess when the icing would come out, when you'd get an air bubble, etc. Also, the bags can be thrown away and the containers were nearly impossible to get clean. I got the 100-pack of bags for $20 and used a 40% off coupon from their web site. Also, on the pink/purple batch, I'm using the Americolor food coloring that nearly every blog suggests, which I found at Hobby Lobby.
Happy decorating!
Good luck practicing on your cookies. Some day I would love to learn how to make them pretty! Oh, and I love Bake at 350's blog-- been following for awhile!
ReplyDeleteThey look so cute! So does Jacob :)
ReplyDelete